


因为🦞实在太火了,加上看多了AI相关的东西搞得人很焦虑,所以还是打算自己部署一下找点自我安慰吧🤷。先不说我能用来干啥,就想探一探它这么火的原因😮💨在Windows中折腾了一天,终于算是初步跑通了,并配置了Telegram和飞书两个channel。
OpenClaw 是一个适用于任何操作系统的 AI 智能体 Gateway 网关,支持 WhatsApp、Telegram、Discord、飞书等多种聊天应用。
阅读目录
• 安装前准备 • Windows 安装流程 • macOS 安装流程 • Telegram 集成使用 • 飞书集成使用 • 常见坑和注意点
安装前准备
系统要求
• Node.js: 需要 Node 22 或更新版本 • 操作系统: • Windows: 推荐使用 WSL2 (Ubuntu) • macOS: 原生支持 • Linux: 原生支持
检查 Node.js 版本
node --version如果版本低于 22,请先升级 Node.js。
Windows 安装流程
方法一:使用安装脚本(推荐)
# 在 PowerShell 中运行
iwr -useb https://openclaw.ai/install.ps1 | iex
方法二:使用 npm 安装
npm install -g openclaw@latest方法三:使用 WSL2(强烈推荐)
1. 安装 WSL2 Ubuntu • 打开 PowerShell(管理员)运行: wsl --install• 重启电脑并完成 Ubuntu 设置 2. 在 WSL2 中安装 OpenClaw # 更新系统 sudo apt update && sudo apt upgrade -y # 安装 Node.js 22 curl -fsSL https://deb.nodesource.com/setup_22.x | sudo -E bash - sudo apt-get install -y nodejs # 安装 OpenClaw curl -fsSL https://openclaw.ai/install.sh | bash
运行新手引导
# 在 WSL2 终端中运行
openclaw onboard --install-daemon
新手引导会帮助你:
• 配置模型和认证(推荐使用 Anthropic API Key) • 设置 Gateway 运行模式 • 配置聊天渠道 • 安装后台服务(systemd)
启动 Gateway
# 查看服务状态
openclaw gateway status

# 手动启动
openclaw gateway --port 18789

# 重启服务
openclaw gateway restart
验证安装
openclaw status
openclaw health
macOS 安装流程
方法一:使用安装脚本(推荐)
# 在终端中运行
curl -fsSL https://openclaw.ai/install.sh | bash
方法二:使用 Homebrew 安装 Node.js 后用 npm
# 安装 Node.js 22
brew install node@22

# 安装 OpenClaw
npm install -g openclaw@latest
方法三:使用 pnpm
pnpm add -g openclaw@latest运行新手引导
# 安装并启动服务
openclaw onboard --install-daemon
新手引导步骤:
1. 选择 Gateway 运行模式(Local 或 Remote) 2. 配置 AI 模型提供商(Anthropic、OpenAI 等) 3. 设置认证方式(OAuth 或 API Key) 4. 配置聊天渠道(WhatsApp、Telegram、飞书等) 5. 安装后台服务(launchd)
启动 Gateway
# 查看服务状态
openclaw gateway status

# 手动启动
openclaw gateway --port 18789

# 重启服务
openclaw gateway restart
访问控制界面
在浏览器中打开:http://127.0.0.1:18789/
Telegram 集成使用
1. 创建 Telegram 机器人
1. 在 Telegram 中搜索并打开 @BotFather (⚠️注意是带蓝标认证的) 2. 发送 /newbot命令3. 按照提示设置机器人名称和用户名(用户名必须以 bot结尾)4. 复制返回的 Token(格式如 123456:ABC-DEF1234ghIkl-zyx57W2vxxu123ew11)
2. 配置 OpenClaw
方式一:通过向导配置
openclaw channels add选择 telegram 并粘贴 Bot Token。
方式二:通过环境变量
export TELEGRAM_BOT_TOKEN="你的机器人Token"方式三:通过配置文件
编辑配置文件:
• macOS/Linux: ~/.openclaw/openclaw.json• Windows: %USERPROFILE%\.openclaw\openclaw.json
{
  "channels":{
    "telegram":{
      "enabled":true,
      "botToken":"你的机器人Token",
      "dmPolicy":"pairing",
      "groups":{
        "*":{
          "requireMention":true
        }
      }
    }
}
}
3. 重启 Gateway
openclaw gateway restart4. 测试使用
1. 在 Telegram 中搜索你的机器人 2. 发送第一条消息(会收到配对码) 3. 批准配对:
openclaw pairing list telegram
openclaw pairing approve telegram <配对码>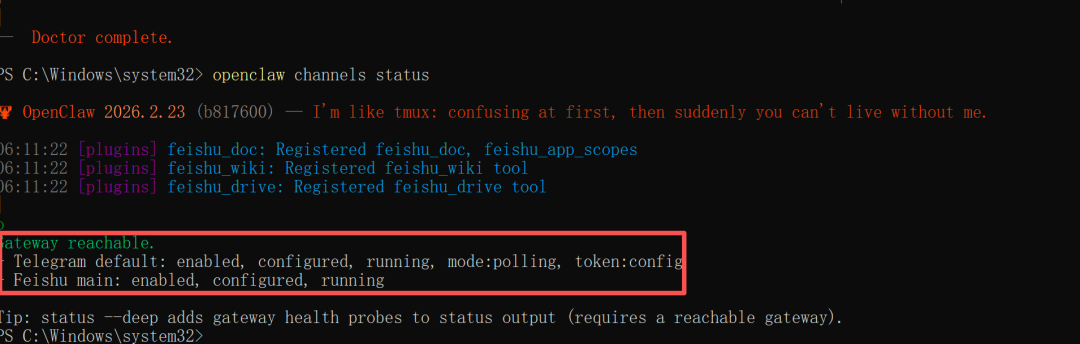
4. 批准后即可正常对话
⚠️如果和它聊天没反应,则需要回到终端运行openclaw config set channels.telegram.proxy "http://127.0.0.1:代理端口" 来打破通信阻碍。
5. 在群组中使用
1. 将机器人添加到群组 2. 默认情况下需要 @机器人名提及才会响应3. 想要机器人自动响应所有消息,在配置中设置 requireMention: false
常用命令
/status | |
/reset | |
/model | |
/activation always | |
/activation mention |
飞书集成使用
1. 安装飞书插件
方式一:使用 openclaw plugins 命令(推荐)
openclaw plugins install @openclaw/feishu方式二:使用 npm 全局安装(Windows 兼容性好)
如果遇到 spawn EINVAL 错误,可以直接用 npm 安装:
# macOS/Linux
npm install -g @openclaw/feishu

# Windows PowerShell
npm install -g @openclaw/feishu
方式三:使用 pnpm
pnpm add -g @openclaw/feishu方式四:手动克隆源码
git clone https://github.com/openclaw/feishu.git ~/.openclaw/plugins/feishu2. 创建飞书应用
步骤 1:创建应用
1. 访问 飞书开放平台 并登录 2. 点击 创建企业自建应用 3. 填写应用名称和描述,选择应用图标
步骤 2:获取应用凭证
在应用的 凭证与基础信息 页面,复制:
• App ID(格式如 cli_xxx)• App Secret
步骤 3:配置应用权限
在 权限管理 页面,点击 批量导入,粘贴以下 JSON:
{
  "scopes":{
    "tenant":[
      "aily:file:read",
      "aily:file:write",
      "application:application.app_message_stats.overview:readonly",
      "application:application.self_manage",
      "application:bot.menu:write",
      "cardkit:card:write",
      "contact:user.employee_id:readonly",
      "corehr:file:download",
      "docs:document.content:read",
      "event:ip_list",
      "im:chat",
      "im:chat.access_event.bot_p2p_chat:read",
      "im:chat.members:bot_access",
      "im:message",
      "im:message.group_at_msg:readonly",
      "im:message.group_msg",
      "im:message.p2p_msg:readonly",
      "im:message:readonly",
      "im:message:send_as_bot",
      "im:resource",
      "sheets:spreadsheet",
      "wiki:wiki:readonly"
    ],
    "user":[
      "aily:file:read",
      "aily:file:write",
      "im:chat.access_event.bot_p2p_chat:read"
    ]
}
}
步骤 4:启用机器人能力
在 应用能力 > 机器人 页面:
1. 开启机器人能力 2. 配置机器人名称
步骤 5:配置事件订阅
⚠️ 重要:确保 OpenClaw Gateway 已启动
在 事件订阅 页面:
1. 选择 使用长连接接收事件(WebSocket 模式) 2. 添加事件: im.message.receive_v1
步骤 6:发布应用
1. 在 版本管理与发布 页面创建版本 2. 提交审核并发布 3. 等待管理员审批(自己就是管理员的话就自动审批通过了)
3. 配置 OpenClaw
方式一:通过向导配置
openclaw channels add选择 feishu 并输入 App ID 和 App Secret。
方式二:通过环境变量
export FEISHU_APP_ID="cli_xxx"
export FEISHU_APP_SECRET="xxx"
方式三:通过配置文件
编辑配置文件:
• macOS/Linux: ~/.openclaw/openclaw.json• Windows: %USERPROFILE%\.openclaw\openclaw.json
{
  "channels":{
    "feishu":{
      "enabled":true,
      "dmPolicy":"pairing",
      "accounts":{
        "main":{
          "appId":"cli_xxx",
          "appSecret":"xxx",
          "botName":"我的AI助手"
        }
      }
    }
}
}
4. 重启 Gateway
openclaw gateway restart5. 测试使用
1. 在飞书中找到你的机器人并发送消息 2. 首次会收到配对码,批准配对:
openclaw pairing list feishu
openclaw pairing approve feishu <配对码>
3. 批准后即可正常对话
6. 在群组中使用
1. 将机器人添加到群组 2. 默认需要 @机器人提及才会响应3. 配置示例:
{
  "channels":{
    "feishu":{
      "groups":{
        "oc_xxx":{
          "requireMention":false
        }
      }
    }
}
}
常用命令
/status | |
/reset | |
/model |
常见坑和注意点
Windows 通用问题
1. WSL2 网络访问问题
问题:Gateway 无法从宿主机访问
解决:
• 确保在 WSL2 中使用 0.0.0.0或lan模式• 使用 Windows 防火墙规则允许端口 18789 • 或使用 http://localhost:18789/在宿主机访问
2. Node.js 版本管理
问题:系统 Node.js 版本过低或版本混乱
解决:
• 在 WSL2 中使用 NodeSource 官方包安装 • 避免使用 nvm/fnm 等版本管理器(服务不会加载 shell 初始化) • 运行 openclaw doctor检查环境
3. 权限问题
问题:权限不足导致服务无法启动
解决:
# 确保服务正确安装
openclaw gateway install --force

# 检查日志
openclaw logs --follow
4. 端口占用
问题:端口 18789 已被占用
解决:
# 查看占用进程
netstat -ano | findstr :18789

# 或使用不同端口
openclaw gateway --port 19001
5. openclaw plugins install 报 spawn EINVAL 错误
问题:运行 openclaw plugins install @openclaw/feishu 时报错:
Failed to start CLI: Error: spawn EINVAL原因:Windows PowerShell 与 Node.js 的 spawn 调用存在兼容性问题
解决方案:
方案一:使用 npm 全局安装(推荐)
npm install -g @openclaw/feishu方案二:使用 CMD 而非 PowerShell
# 在 CMD 中运行(不是 PowerShell)
openclaw plugins install @openclaw/feishu
方案三:使用 WSL2(最稳定)
# 在 WSL2 Ubuntu 中运行
openclaw plugins install @openclaw/feishu
方案四:手动克隆插件
git clone https://github.com/openclaw/feishu.git "$HOME\.openclaw\plugins\feishu"安装插件后的配置步骤:
1. 编辑配置文件 %USERPROFILE%\.openclaw\openclaw.json2. 添加飞书配置:
{
  "channels":{
    "feishu":{
      "enabled":true,
      "dmPolicy":"pairing",
      "accounts":{
        "main":{
          "appId":"cli_xxx",
          "appSecret":"xxx"
        }
      }
    }
}
}
3. 重启 Gateway:
openclaw gateway restart4. 验证配置:
openclaw channels status
openclaw logs --follow
macOS 通用问题
1. 权限授予时应用崩溃
问题:点击隐私提示的"允许"时应用消失
解决:
# 重置 TCC 缓存
tccutil reset All bot.molt.mac.debug
2. Gateway 卡在 "Starting..."
问题:应用连接一直卡住
解决:
# 停止监管程序
openclaw gateway stop

# 检查端口占用
lsof -nP -iTCP:18789 -sTCP:LISTEN

# 查看日志
openclaw logs --follow
3. LaunchAgent 服务异常
问题:服务已安装但不运行
解决:
# 检查服务状态
openclaw gateway status

# 查看 launchd 日志
tail -f ~/.openclaw/logs/gateway.log
tail -f ~/.openclaw/logs/gateway.err.log

# 重新安装服务
openclaw gateway install --force
4. PATH 环境变量问题
问题:服务找不到某些工具
解决:
• macOS 服务最小 PATH: /opt/homebrew/bin,/usr/local/bin,/usr/bin,/bin• 将依赖工具路径放入 ~/.openclaw/.env• 或设置 tools.exec.pathPrepend配置
跨平台共同问题
1. Node 版本要求
坑:Node 版本低于 22 会导致兼容性问题
解决:
• 安装 Node 22 或更新版本 • 使用官方安装包,避免版本管理器
2. Bun 运行时不兼容
坑:Bun 与 WhatsApp、Telegram 渠道存在已知问题
解决:
• 使用 Node.js 运行 Gateway(推荐) • Bun 仅可用于其他非聊天渠道
3. 认证配置问题
坑:新智能体没有继承主智能体的认证
解决:
# 检查认证状态
openclaw models status

# 为智能体设置认证
openclaw models auth setup-token --provider anthropic
4. 配置文件位置混乱
坑:多个配置文件导致行为不一致
解决:
• 默认配置: ~/.openclaw/openclaw.json• 自定义配置:使用 OPENCLAW_CONFIG_PATH环境变量• 运行 openclaw doctor检查配置
5. 渠道不响应
坑:机器人不回复消息
解决:
# 检查网关状态
openclaw gateway status

# 检查渠道状态
openclaw channels status --probe

# 查看实时日志
openclaw logs --follow
6. 配对码问题
坑:未批准配对,机器人不回复
解决:
# 查看待审批列表
openclaw pairing list <channel>

# 批准配对
openclaw pairing approve <channel> <code>
7. 媒体文件过大
坑:图片、视频上传失败
限制:
• WhatsApp:图片 6MB,音视频 16MB,文档 100MB • Telegram:默认 5MB • 飞书:默认 30MB
解决:
• 压缩文件后发送 • 或调整 mediaMaxMb配置
8. 群组提及要求
坑:机器人在群组中不响应(未提及)
解决:
• 确保使用 @机器人提及• 或配置 requireMention: false• 检查是否启用了隐私模式(Telegram)
9. 内存占用过高
坑:长时间运行后内存占用增加
解决:
{
  "session": {
    "historyLimit": 100,
    "reset": {
      "mode": "daily",
      "atHour": 4
    }
  }
}
10. 网络连接问题
坑:国内网络访问某些 API 困难
解决:
• 配置代理 • 使用国内镜像(如有) • 检查防火墙规则
调试建议
当遇到问题时,按以下顺序排查:
# 1. 快速状态检查
openclaw status

# 2. 深度诊断
openclaw status --all
openclaw status --deep

# 3. 查看日志
openclaw logs --follow

# 4. 检查健康状态
openclaw health

# 5. 运行诊断工具
openclaw doctor
获取帮助
1. 查看日志: /tmp/openclaw/目录下的日志文件2. 访问官方文档:https://docs.openclaw.ai/zh-CN 3. 在 GitHub 提交 Issue 时包含: • OpenClaw 版本 • 相关日志片段 • 重现步骤 • 配置文件(隐藏密钥)
附录
有用的命令速查
# 安装和配置
openclaw onboard                    # 运行新手引导
openclaw channels add                # 添加渠道
openclaw configure                   # 重新配置
openclaw config set <key> <value>    # 设置配置项

# Gateway 管理
openclaw gateway status              # 查看状态
openclaw gateway start               # 启动
openclaw gateway stop                # 停止
openclaw gateway restart             # 重启
openclaw gateway install             # 安装服务
openclaw gateway uninstall           # 卸载服务

# 渠道管理
openclaw channels login              # 登录渠道(如 WhatsApp QR)
openclaw channels logout             # 登出渠道
openclaw channels status             # 查看渠道状态
openclaw channels status --probe     # 探测渠道状态

# 配对管理
openclaw pairing list <channel>     # 查看待审批配对
openclaw pairing approve <channel> <code>  # 批准配对

# 日志和诊断
openclaw logs --follow               # 实时查看日志
openclaw logs --limit 100            # 查看最近日志
openclaw status --all                # 完整诊断报告
openclaw doctor                      # 运行诊断
openclaw doctor --fix                # 自动修复

# 模型管理
openclaw models list                 # 列出可用模型
openclaw models status               # 查看认证状态
openclaw models auth setup-token     # 设置认证

# 发送测试消息
openclaw message send --target <number> --message "Hello"
配置文件位置
~/.openclaw/openclaw.json | %USERPROFILE%\.openclaw\openclaw.json | |
~/.openclaw/credentials/ | %USERPROFILE%\.openclaw\credentials\ | |
~/.openclaw/agents/<agentId>/sessions/ | %USERPROFILE%\.openclaw\agents\<agentId>\sessions\ | |
~/.openclaw/media/ | %USERPROFILE%\.openclaw\media\ | |
/tmp/openclaw/openclaw-YYYY-MM-DD.log | %USERPROFILE%\.openclaw\logs\/tmp/openclaw/openclaw-YYYY-MM-DD.log |
🦞 祝使用愉快,Token如流水🤪
评论区